
Manage the Customer Portal
Every booking in Taskly has a Customer Portal — a secure, personalised link that gives your customer a real-time view of their booking details, invoices, and photos. The following article outlines what customers can see in the portal and how to manage access.
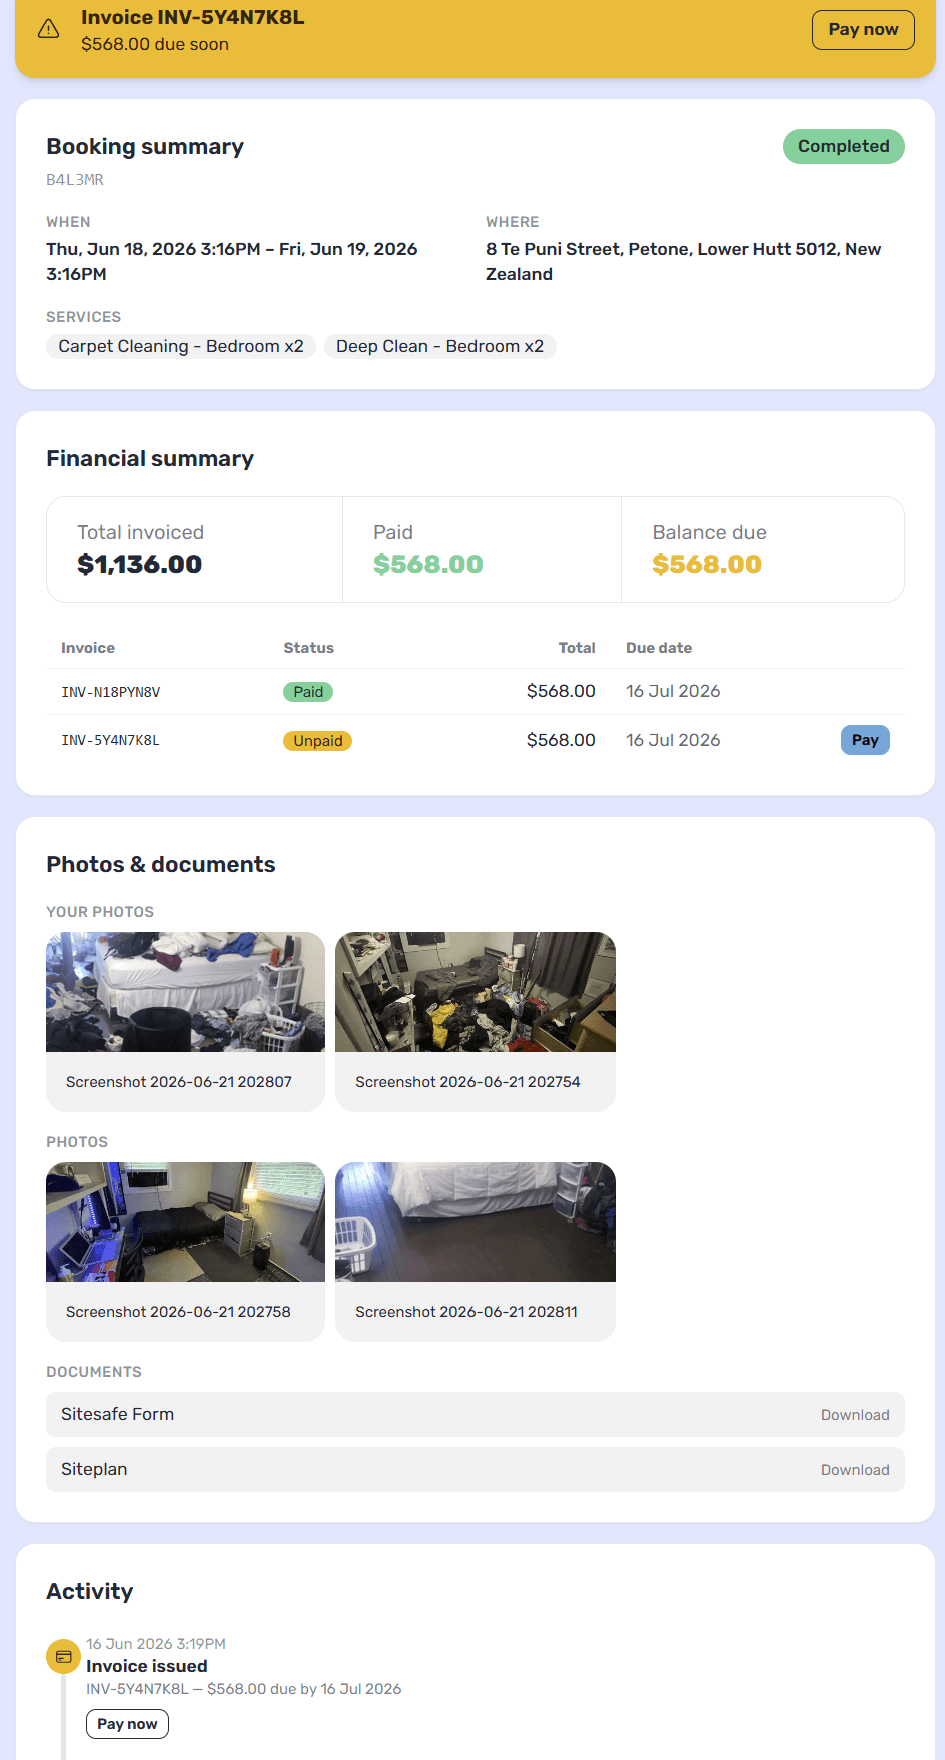
Every customer in Taskly has a Customer Portal — a secure, personalised link that gives them a real-time view of all their bookings, quotes, invoices, and photos in one place. The following article outlines what customers can see in the portal and how to manage access.
What Customers See
The Customer Portal links together everything for that customer, across all of their bookings:
All Bookings — a searchable list of the customer's upcoming and past bookings, grouped by address
Booking Summary — status, date and time, address, and services for the selected booking
Financial Summary — total invoiced, amount paid, balance due, and a list of individual invoices with their payment status. Customers can pay outstanding invoices directly from the portal.
Invoices and Reciepts — customers can access invoices and reciepts for their invoices.
Photos & Documents — before photos are always visible to customers. After photos and documents can be optionally shared when uploading them.
Activity Timeline — a chronological log of key events such as booking confirmed, booking completed, invoice issued, and payments received.
How Customers Access the Portal
Customers don't need a login. Each customer has one unique, secure portal link that covers every booking, quote, and invoice they have with you. Taskly automatically includes this link in emails sent to the customer, including quote emails, booking confirmations, reminders, change notifications, review requests, adhoc messages and invoices.
Sharing Photos and Documents
When uploading after photos or documents to a booking, you can choose whether to share them with the customer via the portal.
Press Manage on the relevant section (After Photos or Documents)
Toggle Share with customer portal on or off
Upload your files
Before photos are always shared with the customer automatically.
Managing Portal Access
Portal access is controlled at the customer level, not per booking, since one portal link now covers everything for that customer.
Go to Customers
Press into the customer, then press Edit
Under Customer Portal, toggle Allow Portal Access on or off
Press Copy Link to get the customer's portal link
Press Save changes
You can also toggle access from any of the customer's bookings.
Open a booking belonging to the customer
Press Turn portal off or Turn portal on in the customer panel
Confirm the change
The portal link itself stays the same even when access is turned off and back on — it never changes.
Turning Off Portal Access
Because the portal link covers a customer's entire history with you, turning off portal access affects all of their bookings, quotes, and invoices, not just the one you're viewing when you turn it off.
If portal access is off for a customer, they will no longer be able to open their portal link for any booking, quote, or invoice. Emails will leave the portal link out without mentioning it, and review requests by text will not be sent, as these all rely on the portal to work.
Was this helpful?